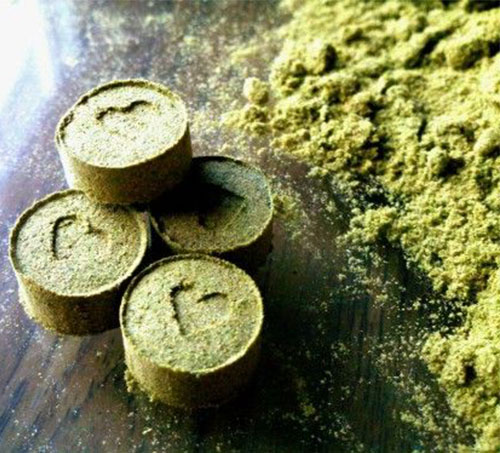
When it comes to improving the potency and shelflife of your stash, there are few devices out that can achieve the same results as a Pollen Press.
In this article, not only will we be covering what a pollen press is and how to use them, but we will be taking a look at the different types of benefits they can give you as well.
Contents
What Is a Pollen Press?
Simply put, a pollen press is a device that is used to compress plant material into what’s generally known as a disk, puck, or pellet. Even though they can be hand-cranked or hydronic driven, all pollen presses can be used to produce the same sort of products.
Why Is It Called a Pollen Press?
When it comes to the different stages of cannabis production, the same parts of the plant can be given many different names. Trichomes, for instance, are the little white-yellow translucent hairs that can be seen growing all over the leaves and buds of the plant.
When the trichomes are removed from the plant, either mechanically or manually, the trichomes are then referred to as “pollen” or Keif. It is this “pollen” that is then dried out to make hashish.
Instead of referring to the end product that a pollen press could be used to produce, manufacturers of pollen presses have chosen to use the term “pollen”. This is simply because a “Hash, Hashish, or Kief” Press doesn’t sound as marketable as a “Pollen Press”, and its easier to skirt around many international laws that are centered around drug paraphernalia.
What are Pollen Presses Used For?
There two main products that pollen presses are commonly used for. The first is to press hash into disks, commonly referred to as coins. The second is to take ground loose-leaf marijuana and to compress it into cakes, or pellets.
There are many reasons why someone may want to do this. Sometimes it can be for personal storage, other times it could be for commercial applications.
If you like more information on how Hashish is made, please have a read of our article on How to Make Ice Water Bubble Hash.
What Are the Benefits of Using a Pollen Press?
The benefits of using a pollen press will largely depend on what you are pressing, and how much of it is being compressed.
For Hashish, there are many practical benefits and product-specific benefits:
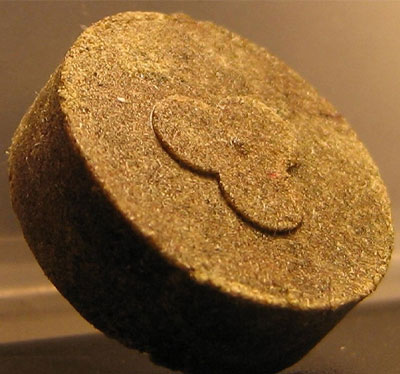
- Handling Hash coins reduces the risk of accidentally wasting some of the stash. It is less likely to be spilled over, and it can’t be blown away by the wind.
- Pressing Hash into disk form reduces the amount of storage space that is needed for the same amount of weight.
- By storing the coins in an airtight container, that’s placed in a cool dry location, that’s kept out of direct sunlight; the Hash can be stored for up to several months.
- The individual coins can also be shrink-wrapped much easier, extending their shelf life even further.
- With the right setup, the coins can be embossed with a brand or marking to indicate the brand or composition.
- Packaging and shipping pressed coins, is much easier than loose powder.
- Hashish that has been blended with other ingredients can be better portioned in coin form.
- Potency can be improved and preserved better by pressing Hash into a disk.
Ground loose-leaf marijuana also has many of the same benefits as pressing the Hash coins:
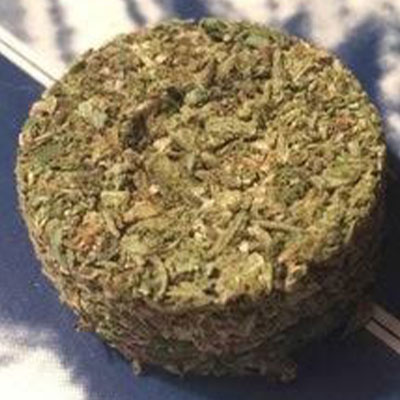
- Pressing loose-leaf into cakes or pellets, greatly reduces the size of the stash.
- Pressed cakes are cleaner to handle and easier to store.
- The densely compacted marijuana can now be stored in a smaller airtight containers.
- Pellets are also easier to freeze than whole leaf.
- Tubs, boxes, sleeves, and paper wraps can all be used as packaging for compressed cannabis products.
- Compared to sitting loose in a baggie, where the mixture could settle at the bottom of the bag, maintaining a quality mix of different blended strains, tobacco, or other flavor enhancers, is easier to achieve if the product is compressed.
How to Use a Pollen Press
Pollen Presses can come in manual and hydraulic form. As there are many different model designs for the hydraulic systems, we would recommend reading the user manuals for these types of presses. Some may apply an upward pressure, others a downward or even side on pressure. There’s also the use of molds and parts that we won’t have the time to go over today.
So for the sake of simplicity, we will be going over the two main variations of the manual pressing systems; the T-bar and the flat cap. Both designs consist of a cylinder that is threaded at both ends. Where the difference comes in, is with how the press is tightened, and the material within is compressed.
Important Information
Before we get into the how-tos for the different designs that are available, we need to point out that you should avoid using tools to apply as much pressure as you can muster.
Only tighten these designs by hand. If you try to use a wrench, pliers, or even a grip bar, to try and get it just that little bit tighter, not only could you cause the pollen press to seize up, you could actually crack the tube or the caps.
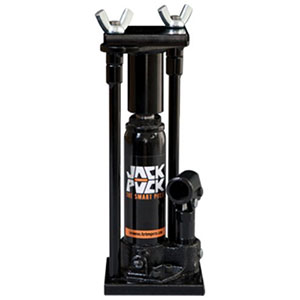
For this reason, we highly recommend not using any tools at all. If you have difficulties with using your hands, look at either using a design that best suits your capabilities, or consider getting a hydraulic press like the one below.
The T-Bar Pollen Press
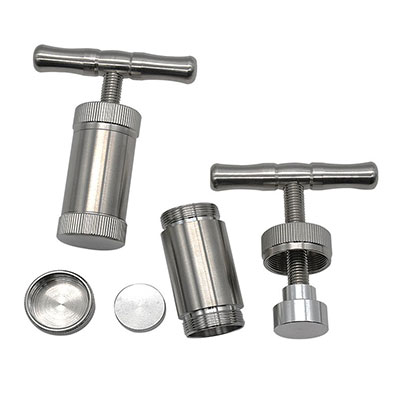
A T-Bar pollen press utilizes a “T” style handgrip that is used to apply pressure to the material within, squeezing out the air pockets, and compressing it into a dense disk. Most of these models are designed to apply pressure in one direction, extending a shaft down onto the material, pressing it against the base plate.
Step one
Place the pin plate, the small insert that comes with the pollen press, flat on/across the inside the internal opening of the base cap. Affix the base cap to the bottom of the tube.
Step Two
Take your dried hash or gound loose-leaf, and place it inside the tube, careful not to spill any.
Step Three
Wind up the T-bar rode, and attach the top cap to the top of the tube.
Step Four
Give the pollen press a gentle tap before turning the T-bar clockwise. Continue to wind down the bar until it becomes tight.
Step Five
Grip the tube in one hand, and turn the T-Bar as tight as you can with the other. When you can’t turn the T-bar any more put the pollen press somewhere out of the way.
Step Six
Leave the materiel under pressure for at least 8 hours. For best results, give the T-bar another turn every hour or two.
Step Seven
As the disk cures, it will harden and solidify into shape. Do not leave the material under pressure for more than two days, as it could harden to the point where it could become difficult to remove.
Undo the cap first and pull it up until the shaft has been pulled out of the tube.
Check to see if the puck is stuck to the shaft or if it is left inside the tube.
Step Eight
If the puck is still inside the tube, undo the base cap instead, and remove the tube.
The Puck may be stuck to either the T-bar shaft or the pin plate insert. If it is stuck to either of these, use a flat object like a plastic knife to remove the puck.
Step Nine
Set the puck aside for later use, or enjoy yourself a freshly pressed hashish or marijuana disk.
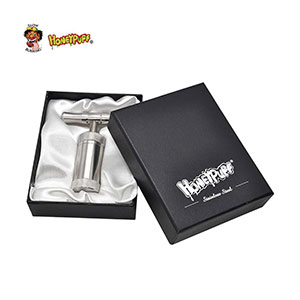  | Honey Puff Pollen Press |
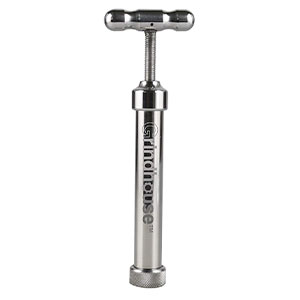  | Grindhouse T-Press |
Flat Cap Pollen Press
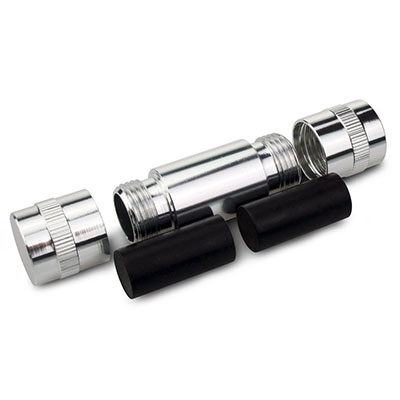
The more general design for a pollen press has two end caps and two pin inserts. Each of these inserts are rather long, half the length of the tube or more. As the end caps are tightened, they bring the tips of these pins closer together, squeezing out the air pockets, and compressing the material within into a dense disk.
Unlike the T-bar design, pressure needs to be applied from both directions. If one cap is screwed on all the way before the other is attached, it may make it become difficult to attach the second cap.
Step one
Place one of the pins on the internal opening of one of the caps. Affix this cap to the bottom of the tube, careful not to tighten it too much.
Step Two
Take your dried hash or gound loose-leaf, and place it inside the tube, careful not to spill any.
Step Three
Insert the 2nd pin, and place the 2nd cap over it and screw it on.
Step Four
Turning both caps at the same time, tighten the caps until they are both tight.
Step Five
Grip the tube in one hand, and turn one of the caps as tight as you can with the other. When you can’t turn the cap any more put the pollen press somewhere out of the way.
Step Six
Leave the materiel under pressure for at least 8 hours. For best results, give both of the caps another turn every hour or two.
Step Seven
As the disk cures, it will harden and solidify into shape. Do not leave the material under pressure for more than two days, as it could harden to the point where it could become difficult to remove.
Undo one of the caps first, remove the pin and check to see if the puck is stuck to it.
Step Eight
If the puck is still inside the tube, undo the other cap instead, and remove the tube.
It is highly likely that the puck could be stuck to either of the pins If so use a flat object like a plastic knife to remove the puck.
Step Nine
Set the puck aside for later use, or enjoy yourself a freshly pressed hashish or marijuana disk.
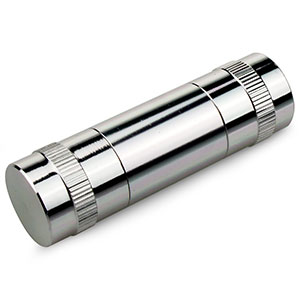  | Cylinder Aluminum Pollen Press |
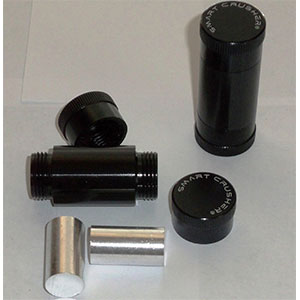  | Smart Crusher 5 piece Herb Pollen Grinder |
Final Thoughts
A pollen press is a great way to increase the shelflife of your stash or to help improve its quality. With a little practice, you could find yourself with the perfect volume to pressure ratio, giving you some of the best disks that you could ever hope to use.
If you are looking to make pucks in volume, remember to use a pollen press that has been made out of quality material, or have a look at the various hydraulic press models that are available.
Leave a Reply
You must be logged in to post a comment.